Controlled Lighting on Metal
Metallic surfaces present unique lighting challenges due to their reflective properties and varied surface finishes. These images demonstrate controlled lighting techniques used to reveal surface texture, stamped markings, corrosion, and component geometry for inspection and documentation.
Purpose
Document stamped identification markings and surface finish on a hex head fastener mounted to a polymer component.
Technique
High-magnification macro capture using controlled directional lighting to emphasize surface texture and stamped characters while minimizing reflective glare from the metal surface.
Testing Notes
Lighting angle was adjusted to maintain legibility of the stamped grade markings (“8.8”) and manufacturer identification while preserving accurate representation of the surrounding polymer material. The controlled lighting setup ensures clear visibility of the fastener head geometry and surface condition for inspection documentation.
Purpose
Capture the interface between a domed metal fastener and surrounding polymer component to evaluate surface condition, markings, and material transitions.
Technique
Macro imaging with diffused directional lighting to control reflections on the curved metal surface and reveal stamped markings and surface wear.
Testing Notes
Lighting was configured to highlight the curvature of the fastener head while preserving detail in the adjacent plastic structure. This approach improves visibility of the fastener’s stamped identification marks and helps document the relationship between the metal fastener and the molded polymer component.
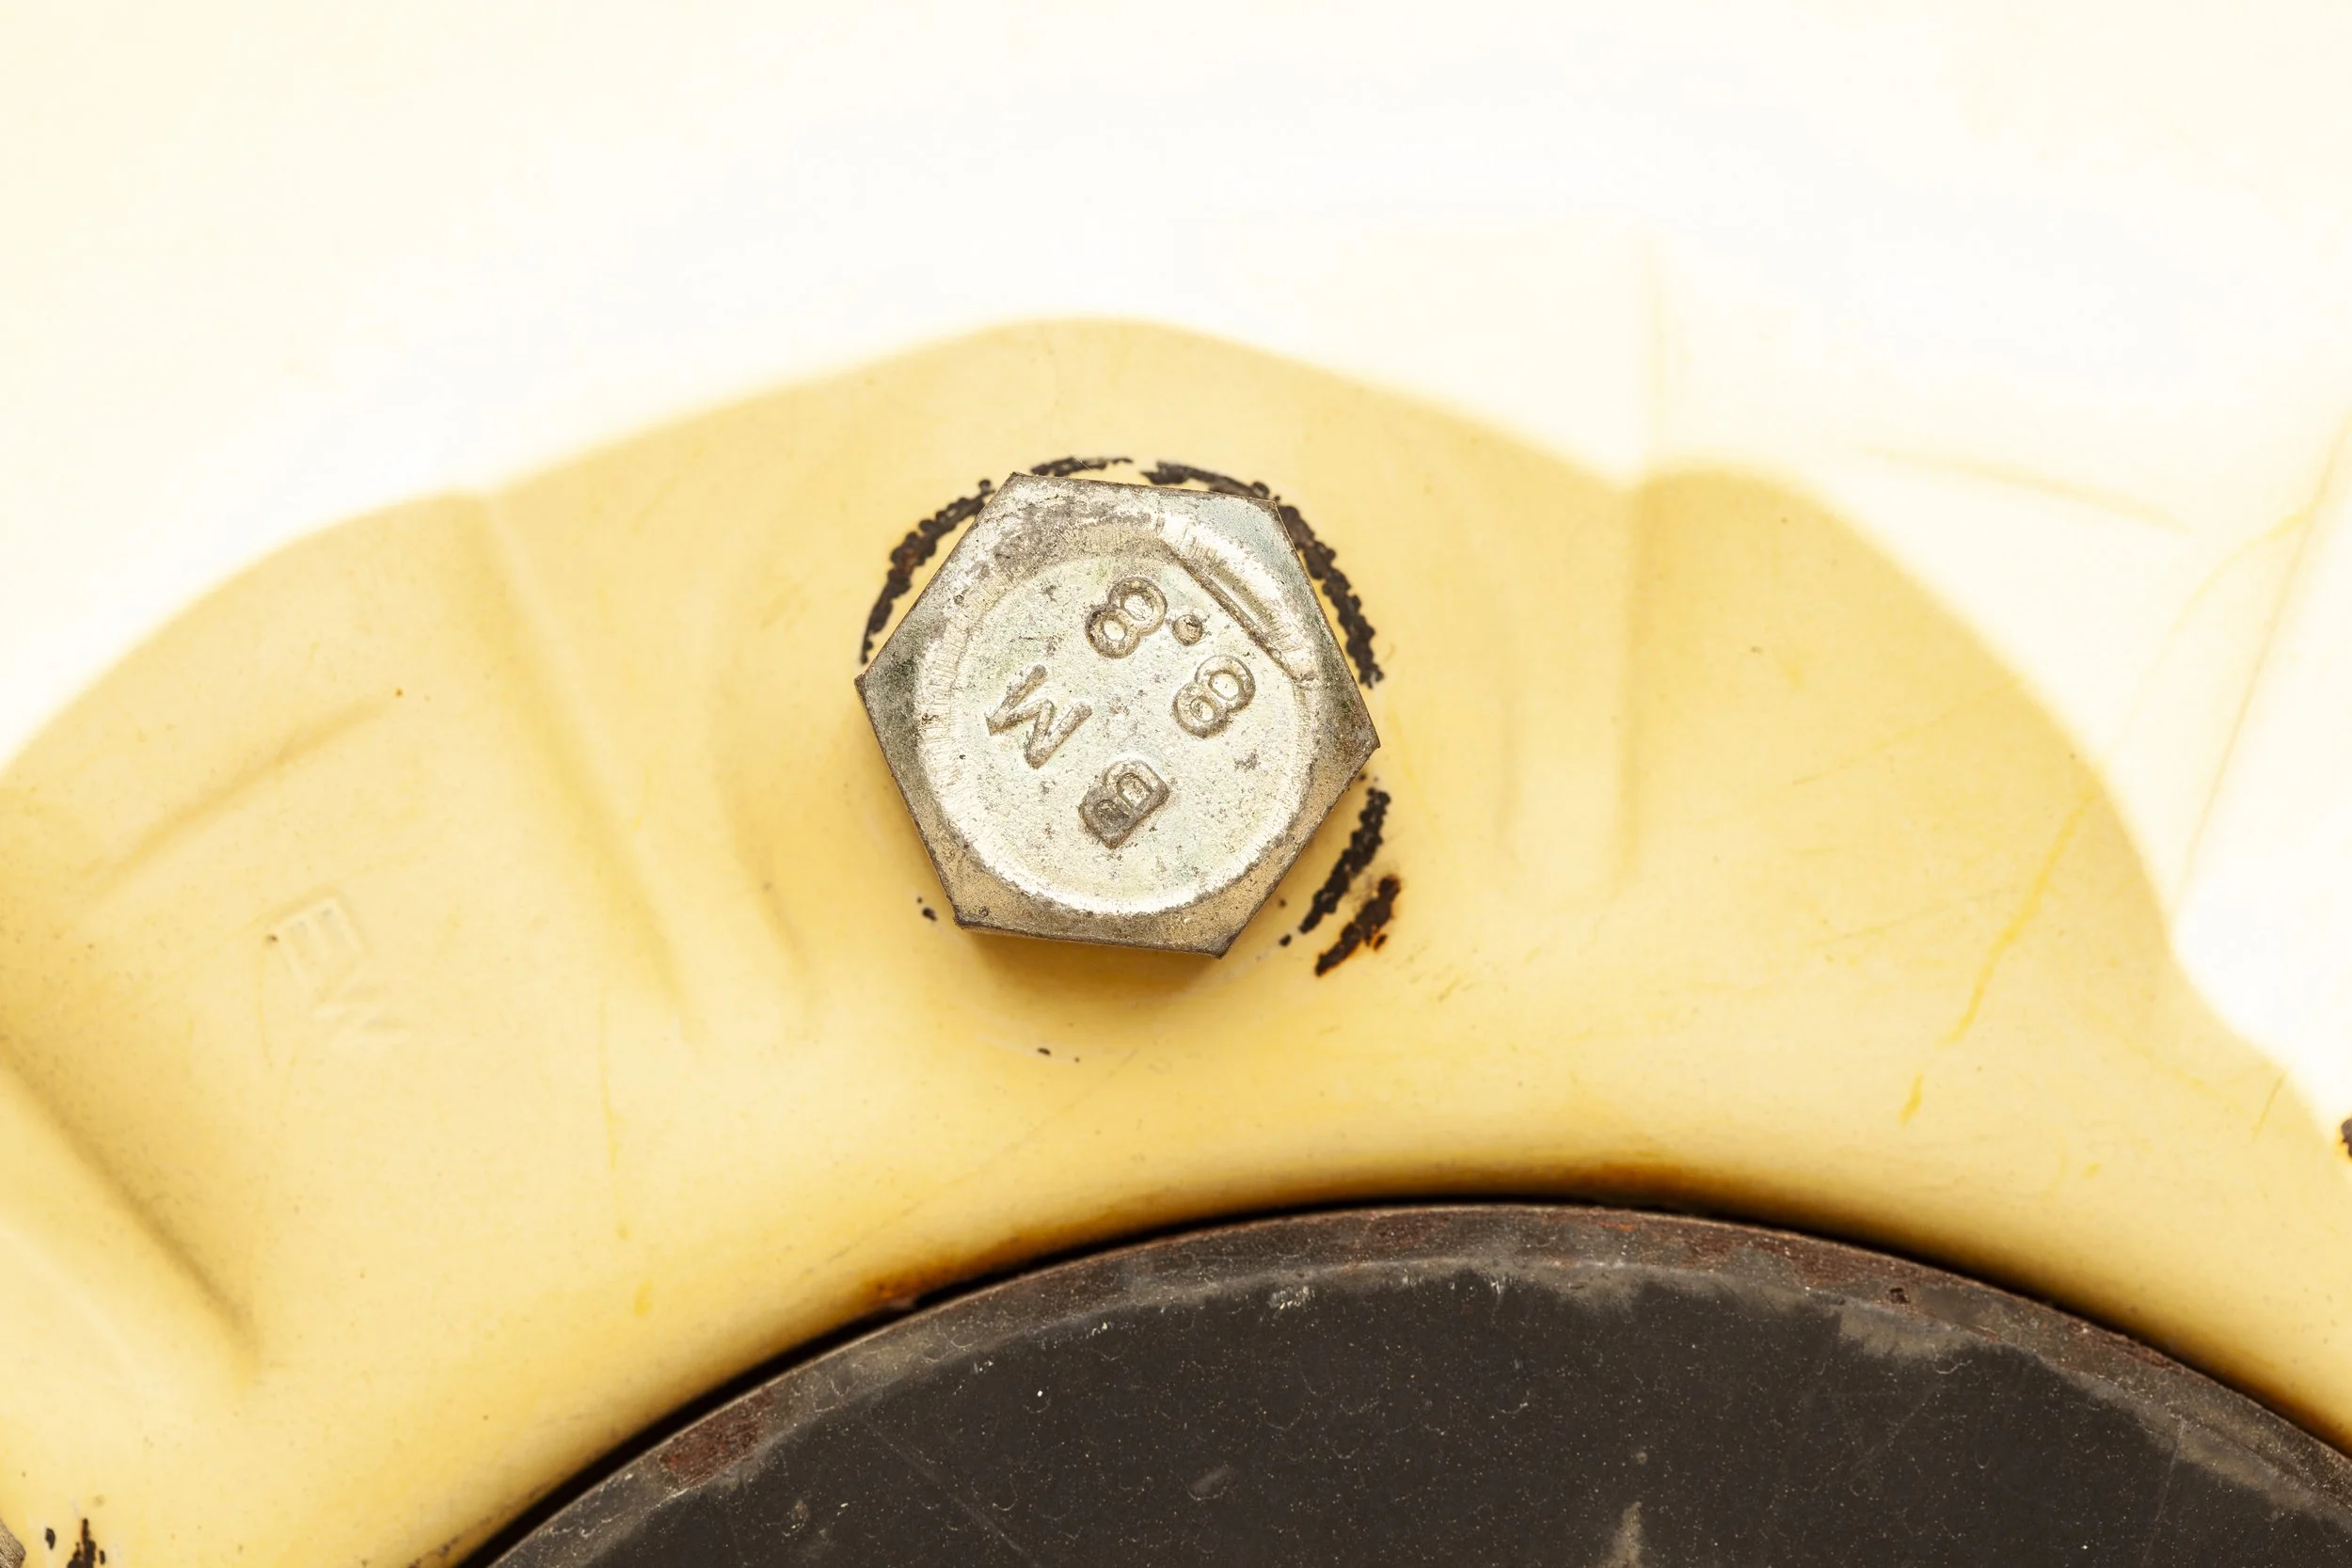
Figure 6 – Hex Head Fastener Markings Under Controlled Lighting
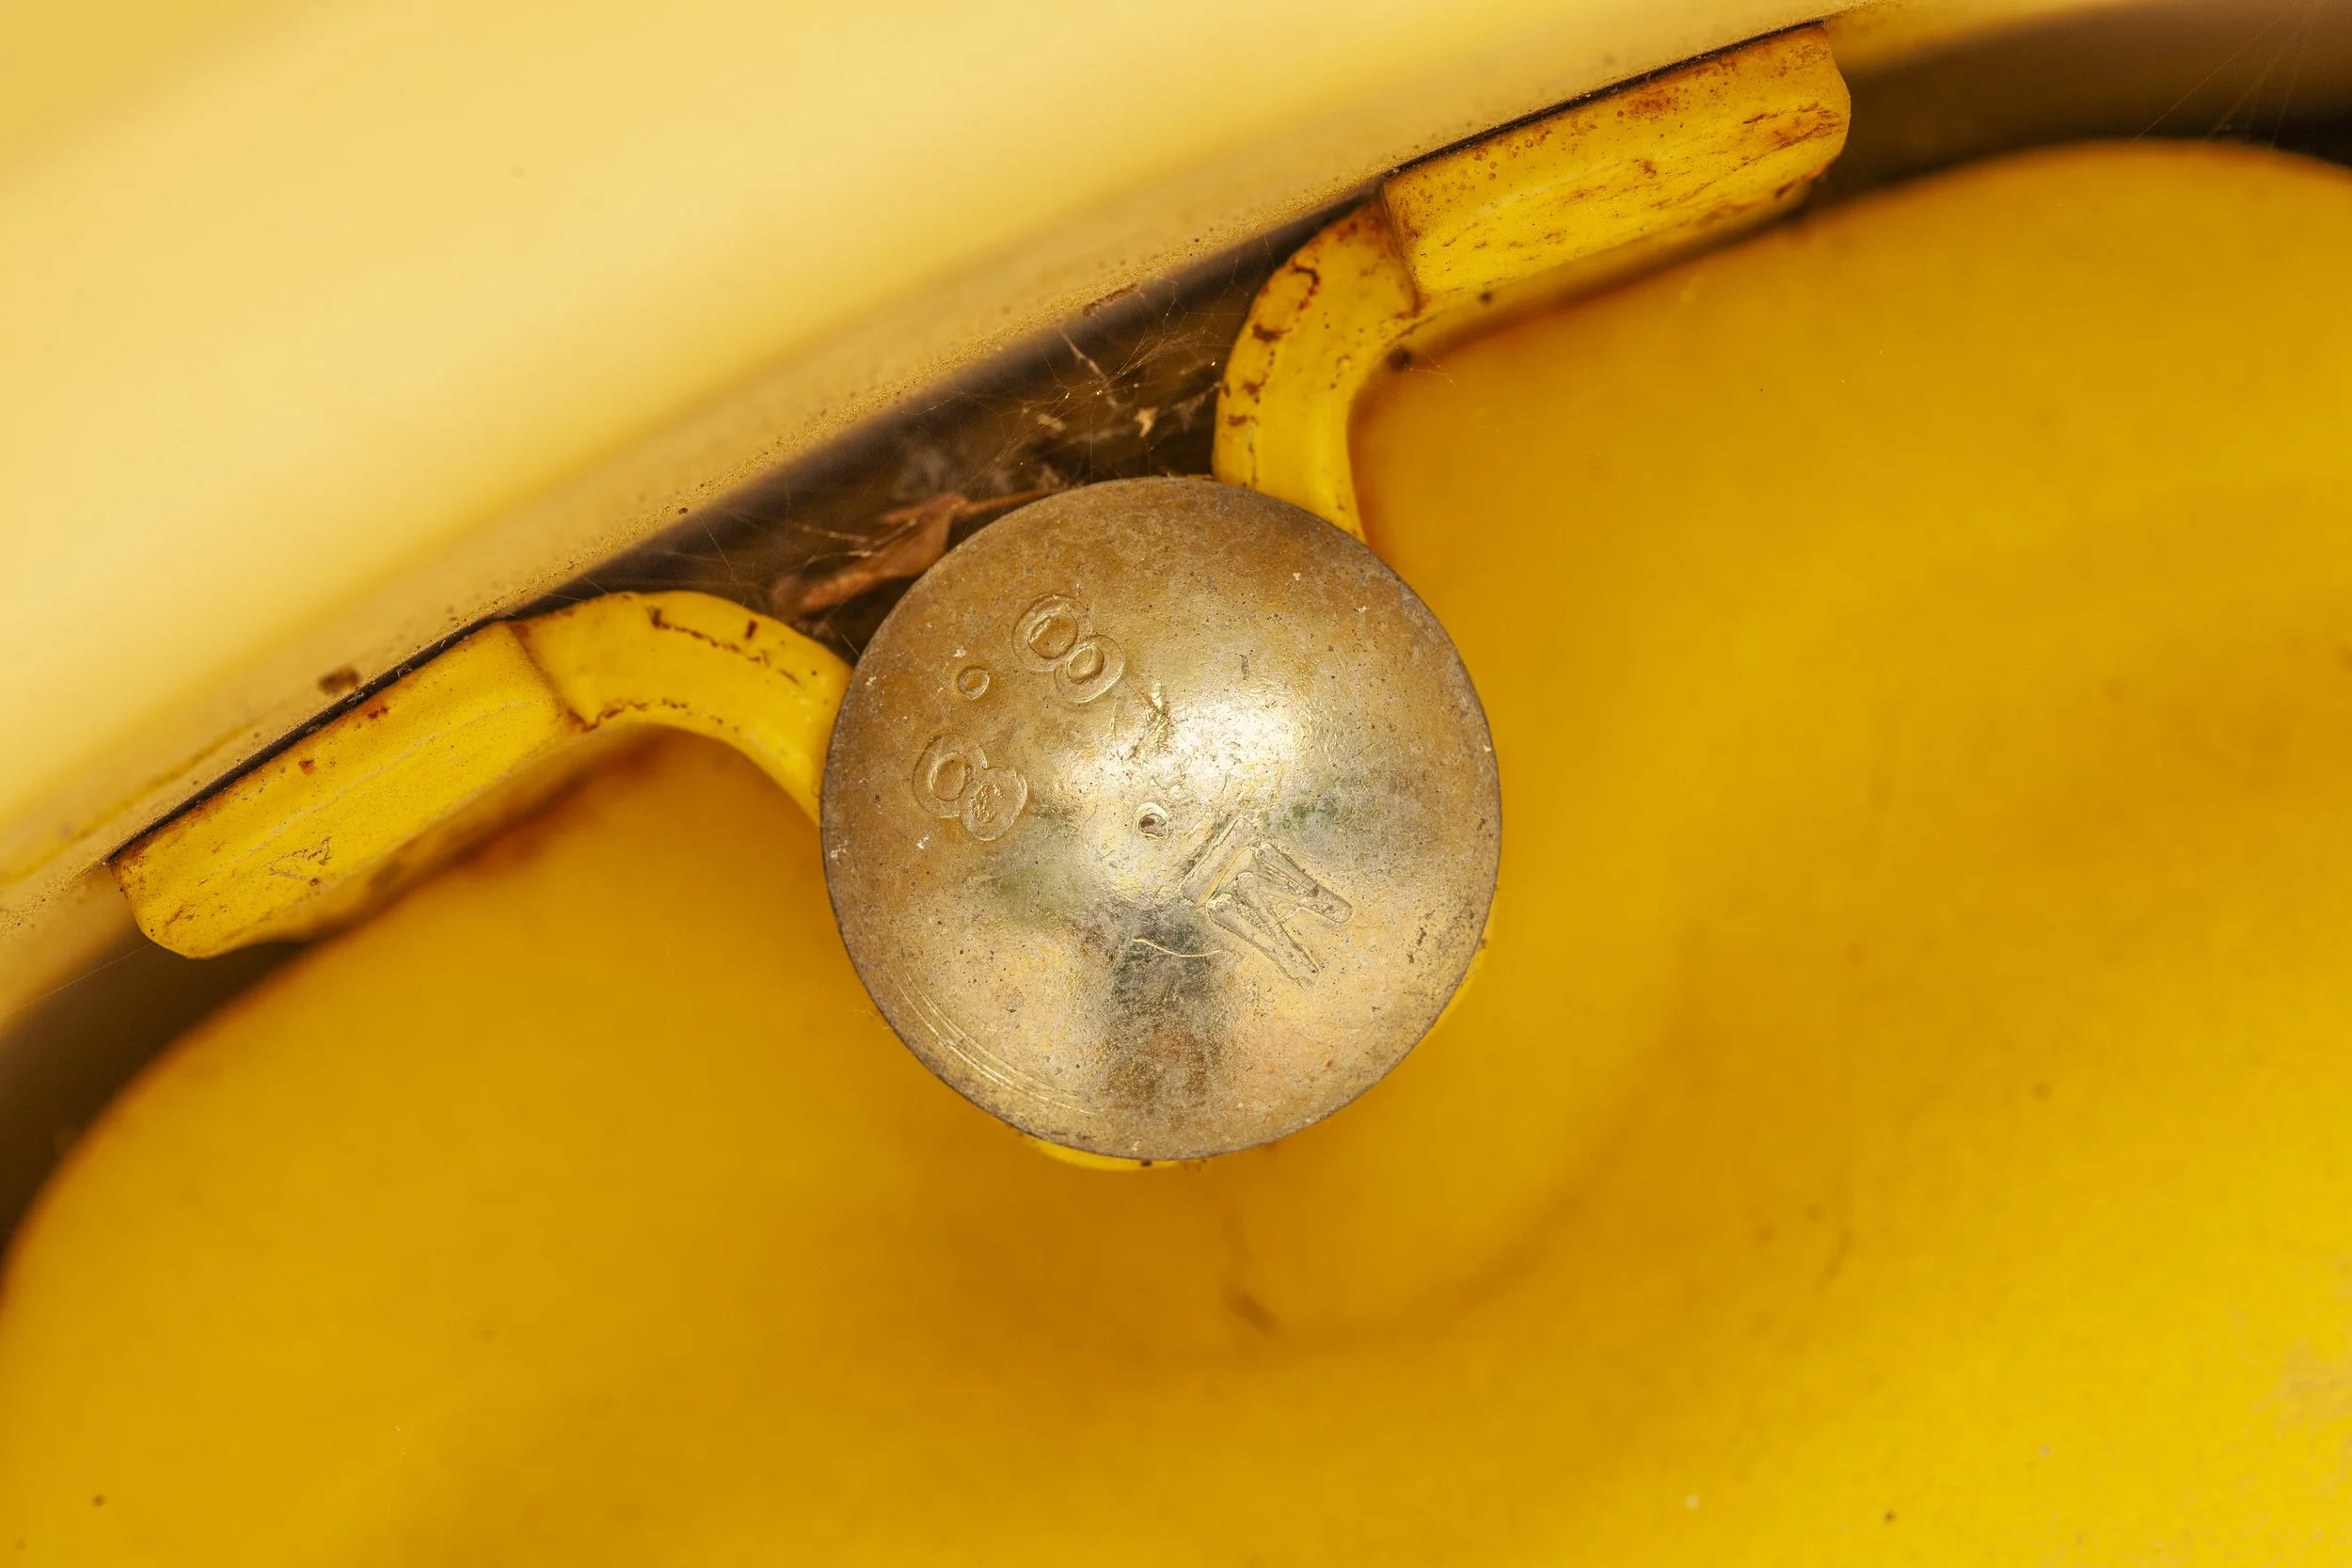
Figure 7 – Domed Fastener Head and Polymer Interface (Controlled Lighting Study)
Controlled Lighting on Glass
Transparent materials present unique lighting challenges due to their reflective and refractive properties. These images demonstrate controlled backlighting techniques used to reveal geometry and surface contours in clear materials.
Image 1 (Broken / irregular glass rim)
Purpose
Demonstrate controlled backlighting techniques used to define the edges and geometry of transparent materials.
Technique
Backlit macro imaging with controlled light positioning to create edge highlights while maintaining a dark background for contrast.
Testing Notes
Lighting placement was adjusted to emphasize the glass rim geometry and irregular contours while minimizing internal reflections. This method allows the outer edges of transparent materials to be clearly defined for documentation or inspection.
Image 2 (Martini glass)
Figure 9 – Reflective Glass Surface with Controlled Edge Lighting
Purpose
Capture the structural geometry of a transparent glass object using controlled lighting to reveal edge definition and material contours.
Technique
Backlighting combined with controlled side illumination to create specular edge highlights that outline the form of the glass.
Testing Notes
Lighting intensity and angle were balanced to prevent glare while preserving clear visibility of the glass silhouette and reflective surfaces.
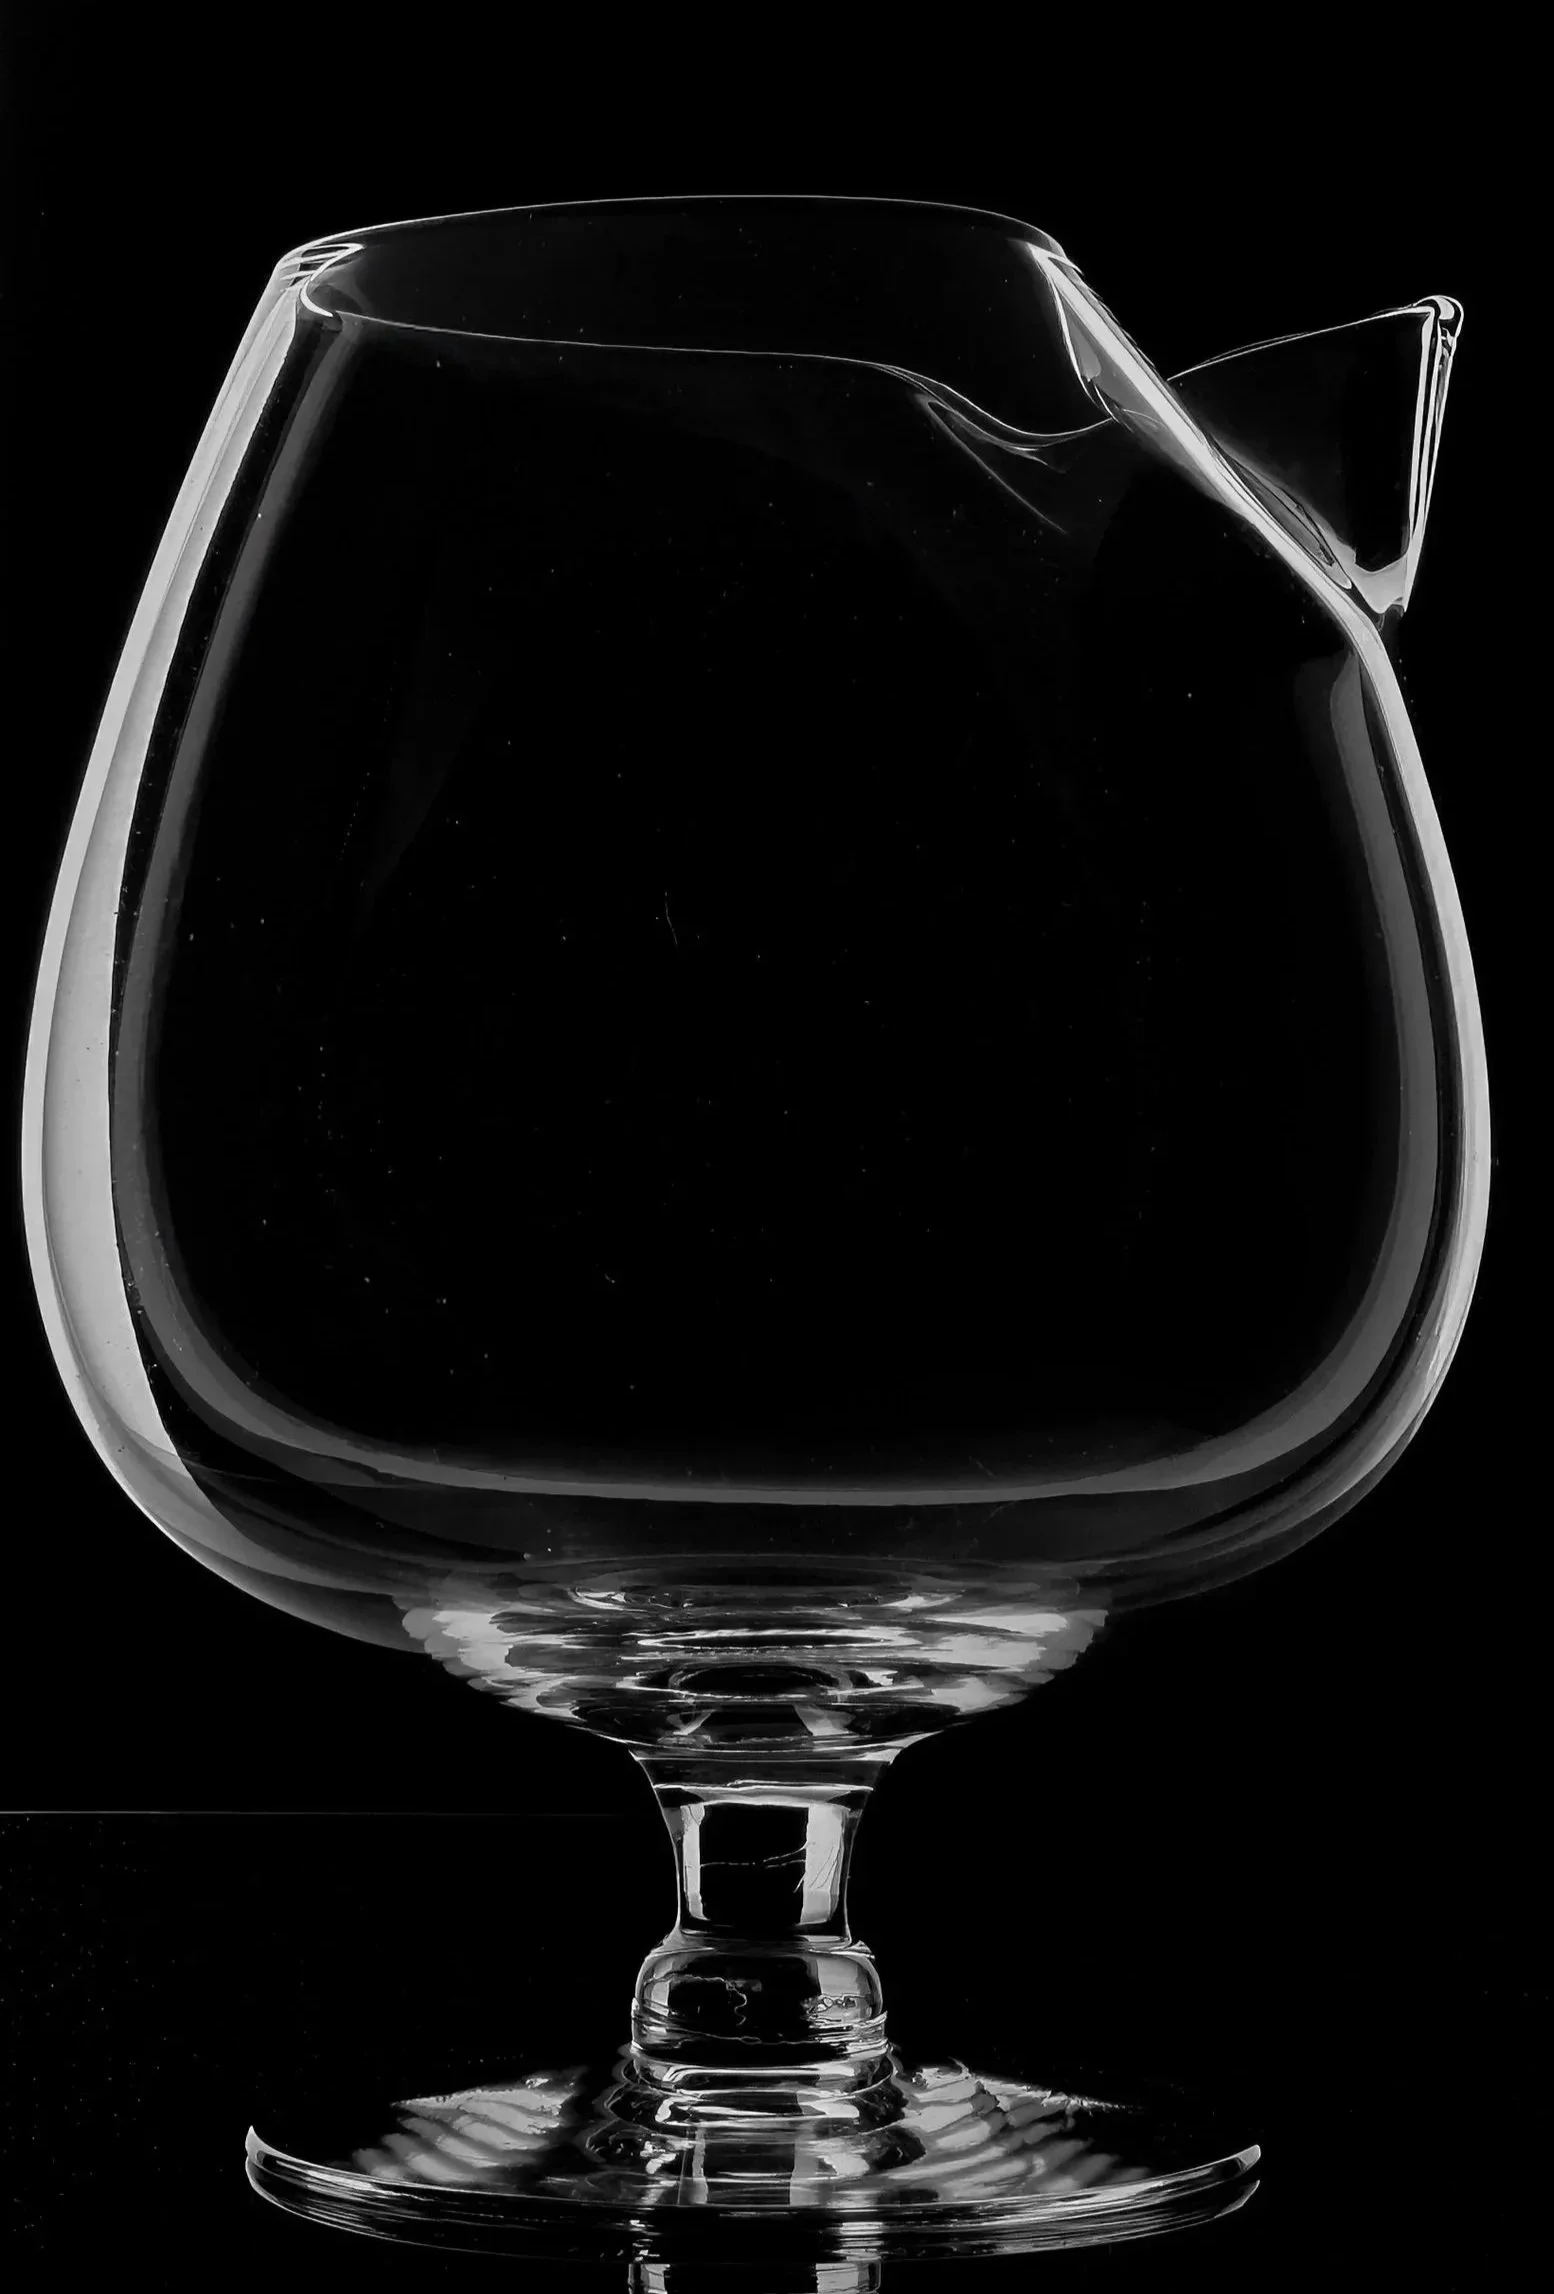
Figure 8 – Transparent Glass Geometry Under Controlled Backlighting

Figure 9 – Reflective Glass Surface with Controlled Edge Lighting
Camera: Canon EOS 5D Mark IV
Lens: 2× Macro Lens
Exposure Settings:
ISO: 100
Aperture: f/13 (selected to preserve depth-of-field across glass edges, rims, and thickness transitions)
Shutter Speed: 1/160 sec
Focus Stacking:
Number of Frames: 12 images (to maintain full depth-of-field across curved glass surfaces and edge geometry)
Lighting:
Rear-mounted strobe with large softbox positioned behind the subject to transmit light through the glass
Two white flags positioned at approximately 45-degree angles at the front to control edge highlights and suppress glare
Lighting configured to reveal thickness variation, internal structure, and edge definition
Stability:
Tripod-mounted camera
Controlled subject placement to maintain alignment during focus stacking
Remote release / timer to eliminate vibration
Processing:
Focus stack composited in Adobe Photoshop
Tonal normalization applied to maintain accurate representation of glass clarity and density variation
No retouching or alterations affecting structural interpretation
Click here to return to the main portfolio page